


Windows 7 Update Service Not Running Error [4 Quick Solutions]
If you are getting Windows 7 update service not running error you are not alone. Many Windows 7 users have continuously reported encountering problems with their Windows update.
It is necessary to install the latest Windows updates in due time to protect your Windows PC from malicious attacks. Sometimes you might be unable to get these updates due to Windows update errors. This error could happen because of several reasons.
In this detailed guide, we will go over why this error occurs, and 4 different solutions that should fix this issue. Let’s begin troubleshooting this windows update error on Windows 7.
Why is Windows Update Service Not Running
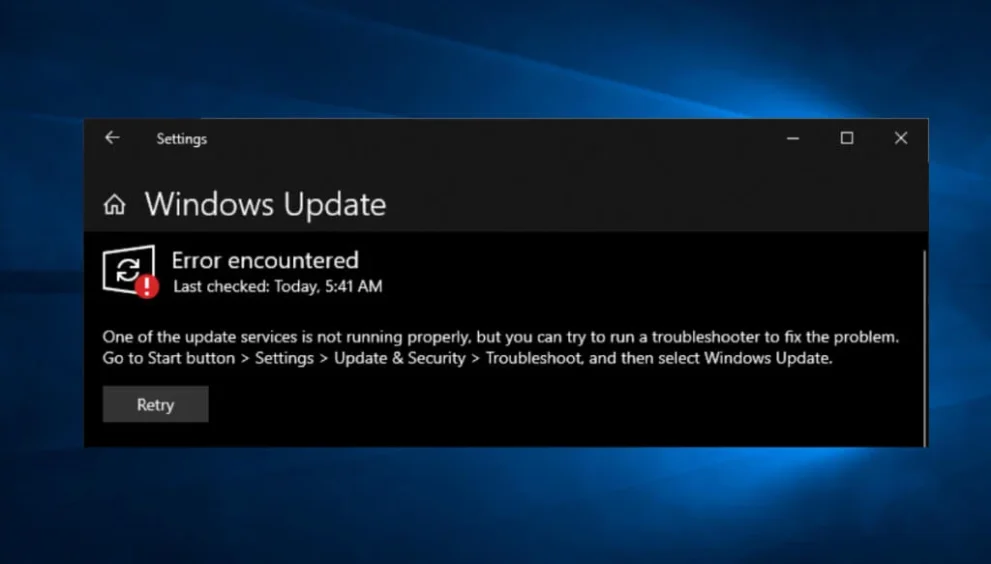
This Windows Update error is one of the most common windows update errors you may encounter. The error message reads; “Windows Update cannot currently check for updates, because the service is not running. You may need to restart your computer.”
Once this error message pops up on your screen, you would want to restart your computer. But restarting your computer may not fix this problem. To avoid this Windows update service issue, you need to check the following points:
Make sure that the dependencies of the service are running. Make sure that you did not set the service to DISABLED. Sometimes when the service is set to log on as the local system account (default) for some reason, perhaps local permissions, it is unable to launch.
In this case, try setting the service to Log on as a known user of the local PC. When the service is set to Log on as a particular user and the service won’t start, make sure that the user name and password is current on the local pc and that the user has the required permissions to launch a service.
If you have changed the password of the user that the service uses, you must also make this change must in each service’s login information.
Make sure that you did not set the user attributes to User must change password at next login. This setting can cause the service to fail. It is advised that an administrator should uncheck the User must change password at next login option and then check the Password never expires box.
How to Fix Windows Update Service Not Running
You can fix this service not running error by following the detailed steps below.
Solution 1 – Restarting the Windows Update Service
This service not running error message is self-explanatory unlike most Windows errors. Therefore, you might as well try to restart the Windows Update service which appears to have been stopped or broken. Along with that, you should also delete specific folders which will ensure a proper reset of the service.
Step 1 – Press the Windows logo key and R simultaneously on your keyboard. This operation will invoke the Run dialog box. In the run box, type “services.msc” and click on OK. This operation will open the Services tool. The alternative way to perform this same operation is to open the Control Panel by finding it in the Start menu. Or, you can search for it by using the search button in the start menu.
Step 2 – When the Control Panel opens, you should change the “View by” setting at the top right corner of the window to “Large or Small Icons” and find the Administrative Tools entry. Click on it and find the Services shortcut below by scrolling down. When you see it, open it as well.
Step 3 – Find the problematic Windows Update in the services list, right-click on it and click on Properties from the menu that comes up.
Step 4 – Check if the service is started just next to the Service status message. If it is, you need to stop it for now by clicking on the Stop button in the middle of the window. If it is stopped, leave it that way until you proceed.
Now you have to delete the software description folder. You can smoothly delete it by following the steps below.
Step 1 – Open My Computer on your Windows 7 PC. You can go there by opening your Windows Explorer interface. Just click the Libraries icon or open any folder and click on This My Computer at the navigation pane on the left side of the window.
Step 2 – Double-click on the drive where you installed your operating system. It is usually Local Disk C by default. Now, try locating the Windows folder. If you cannot see the Windows folder when you open the disk, it is probably because the hidden files are not enabled, so they cannot be seen on your computer. You will need to enable the view of them.
Step 3 – Click on the “View” tab on File Explorer’s menu with the disk being the opened path. Now, click on the “Hidden items” checkbox in the Show/hide section. File Explorer will reveal the hidden files and will keep this option until you change it again.
Step 4 – Find the Software Distribution folder in the Windows folder, right-click on it, and select the Delete option from the context menu.
Step 5 – Now, it is time to finish up this solution and go back to Services and start the Windows Update service. Go back to Services and right-click on the Windows Update entry. Click on Properties. Make sure that you set the option under the Startup type menu in the service’s properties window to Automatic before you proceed with other steps.
Step 6 – Confirm any dialog box that may appear when you change the startup type. Now, click on the Start button in the window. Now, exit.
Check to see if you have fixed the error and if you are now able to update Windows properly. If the problem is still not solved after restarting the Windows Update service, move to the next potential solution below.
Solution 2 – Updating the Intel Rapid Storage Technology Driver
You may wonder what an Intel RST driver has to do with Windows update. Apparently, this solution can solve the error for users who are encountering it at the moment. Some users have tried out more advanced solutions but this one can solve the error in no time. You can simply update the Intel Rapid Storage Technology Driver by following the steps below.
Step 1 – Click on the Start menu button, type in Device Manager, and select the first result which appears. Alternatively, you can press the Windows log key + R key at the same time in order to open the Run dialog box.
Step 2 – Type in “devmgmt.msc” in the Run dialog box and click on OK in order to run it. Now, expand the Disk drives section by clicking on the arrow right near it and find the drive that uses the Intel Rapid Storage Technology. Ensure that sure you consult your manufacturer’s website to get more information on that. Right-click on that device and click on the Uninstall Device option
Step 3 – Confirm any dialogues that may ask you to confirm your choice and then wait for the process to be complete.
Step 4 – Locate the Intel Rapid Storage Technology driver by clicking on this link where you are going to choose the operating system you are using.
Step 5 – Download the correct file and save it to your computer. Now run it from the Downloads folder. Follow the on-screen instructions and install it and restart your PC.
Step 6 – Now, check to see if you have succeeded in solving the error.
If the issue is still not solved after updating the Intel Rapid Storage Technology driver, move to the next potential solution below.
Solution 3 – Check updates option
Updates can be managed more efficiently on Windows 7 than on Windows 10. For instance, you can simply choose to install updates at all or not on Window 7. This is what you will do precisely in order to fix the error.
If the error message pops up when you are trying to check for updates, you can fix it by performing the following operations.
Step 1 – Click on the Start menu button and search for the control panel. When you see it, open it. You can also search for the Control Panel in the Start menu directly on your Windows 7 PC.
Step 2 – In the Control Panel, set the View as option to Large icons at the top right corner and click Windows update.
Step 3 – On the left side of your screen, you will see the list of various settings, select Change settings. Look under the important updates section and click on the dropdown list. Select the Never check for updates option.
Step 4 – Once you have finished, go back to the Windows Update section in the Control Panel and find the Check for updates option. It should be just above the Change settings option that you have opened on the left side navigation menu.
Step 5 – Now, check to see if you can now install the updates. Do not forget to undo the changes you have made when you have successfully installed the update.
If the issue is still not solved after you have performed this solution, move to the next potential solution below.
Solution 4 – Re-register Windows Update Files
These files are the core .dll files that are responsible for the Windows Update service. You need to try and re-register these files using an administrative Command Prompt.
This solution is going to take more than 60 seconds. I have found that this solution worked for many users across different operating systems.
Step 1 – Tap the search button right next the Start menu to search for “Command Prompt” by typing it.
Step 2 – Right-click on the first result at the top of the window and click on the “Run as administrator” option.
Step 3 – Press the Windows Logo Key + R key at the same time. This operation will open up the Run dialog box.
Step 4 –On the next screen, type “cmd” in the text box and press Ctrl + Shift + Enter. This operation will open up an elevated command prompt. Once the User Account Control (UAC) prompts you, click on Yes to give administrative privileges.
Step 5 – Type in the commands given below and make sure you click on the Enter key on your keyboard after typing each command:
regsvr32 wuapi.dll
regsvr32 wuaueng.dll
regsvr32 wups.dll
regsvr32 wups2.dll
regsvr32 wuwebv.dll
regsvr32 wucltux.dll
Step 6 – When you are done, type “exit” in the Command Prompt. Restart your PC and check for updates once again to see if you have succeeded in fixing the issue. If the problem is still not solved after you have performed this solution, move to the next potential solution below.
Solution 5 – Restarting your Windows Update associated services
You are likely to get the service not running error when the services associated with your Windows Update are disabled. In this scenario, you need to restart those services and check if this fixes the error. To restart your Windows update associated services, you need to follow the steps below.
Step 1 – Press the Windows logo key and R simultaneously on your keyboard. This operation will invoke the Run dialog box. In the Run dialog box, type in “services.msc” and click on OK. This operation will open the Services snap-in.
Step 2 – Double click on the option that says, Background Intelligent Transfer Service. Make sure you set the startup type to Automatic. Now, click on the Start button. Check if the Start button is in gray. If it is, you need to click on the Stop button and then click on the Start button. Click on OK to close the window.
Step 3 – Double click on Cryptographic Services. Make sure that you set the startup type to Automatic.
Step 4 – Click on the Start button. Check if the Start button is in gray. If it is, you need to click on the Stop button and then click on the Start button. Close the window by clicking on OK. Double click Windows Update. Ensure that you set the startup type to Automatic.
Step 5 – Now, click on the Start button. Check if the Start button is in gray. If it is, you need to, click on the Stop button and then click on the Start button. Click on OK to close the window.
Step 6 – Close the Services snap-in and restart your PC. Now, check to see if you have resolved the problem. By now, the Windows Update service not running error should be gone.
How to Update Windows Update Agent to the latest version
When you have turned on automatic update, the newest version of the Windows Update Agent will be downloaded and installed automatically on your PC. Alternatively, you can manually download and install the Windows Update Agent.
If you want to download the Windows Update Agent automatically, you need to follow these steps:
These steps are applicable to Windows 7, Windows Vista, or Windows XP operating systems.
Step 1 – To automatically turn on automatic updating, click on Fix it button or link, and then click on Run in the View Download dialog box. Now, follow the steps in the Fix it wizard.
Step 2 – Once you are done, restart the Windows Update service. You can do this by following these steps: Press the Windows logo key + R simultaneously. This operation will open up the Run dialog box.
Step 3 – Once you are done, type services.msc in the Run dialog box, and then hit the Enter button on your keyboard.
Step 4 – Right-click on Windows Update in the Services management console. Now, click on the Stop button. For Windows XP users, right-click on Automatic Updates, and then click on Stop.
Step 5 – Once the Windows Update stops, right-click on Windows Update, and then click on the Start button. For Windows XP users, right-click on Automatic Updates, and then click on Stop.
Step 6 – Finally, wait for the Windows Update to start, and then confirm that the Windows Update Agent is updated.
Manually download Windows Update Agent from the Microsoft Download Center
You can download the latest Windows Update Agent from the Microsoft download center by clicking on the download link for your Windows’ version. Stand-alone packages for Windows Server 2008 R2 SP1 and Windows 7 SP1Once you have downloaded the Windows Update Agent from the Microsoft download center, open the downloaded file and install it.
Conclusion
The Windows 7 Update service not running issue is a common windows update error encountered by many users. It is quite easy to fix. Sometimes you would have to restart Windows Update services to fix it. In this article, I have provided you with the solutions to help you fix it. Now it’s your turn to perform these solutions and conquer this error.
![Windows 7 Update Service Not Running Error [4 Quick Solutions]](https://techinfluence.net/wp-content/uploads/2025/04/1077_2104091116133A_14-150x150.jpg)
![Windows 7 Update Service Not Running Error [4 Quick Solutions]](https://techinfluence.net/wp-content/uploads/2025/04/Audio-Technica-ATH-M20x-M30x-M40x-M50x-Headphones-Review-and-Comparison-150x150.webp)